Connect to Azure Blob Storage
Use Azure Blob Storage to import source files or write pipeline output to a container.
Prerequisites
Have the following ready:
- An Azure storage account and blob container.
- A complete Azure Storage connection string that includes an explicit
BlobEndpoint. - The container name when using Basic Setup or configuring a destination.
- Edit access to the Rhombus project. To add a source, you also need access to third-party integrations, an available connector, and enough sync credits for the first import.
Sources support CSV and Excel files (.csv, .xls, and .xlsx). Destinations
can export CSV or Excel (.xlsx).
Accepted connection strings
Use a SAS-based connection string when possible. Copy the full string generated
by Azure—not just the SAS token or URL. It must include BlobEndpoint and
SharedAccessSignature:
BlobEndpoint=https://<storage-account>.blob.core.windows.net/;
SharedAccessSignature=<sas-token>
Account-key connection strings also work when they include BlobEndpoint,
AccountName, and AccountKey:
BlobEndpoint=https://<storage-account>.blob.core.windows.net/;
AccountName=<storage-account>;
AccountKey=<account-key>
Prefer a short-lived, narrowly scoped SAS over an account key. Treat either connection string like a password. Never share it, commit it, or paste it into documentation. Update the connection whenever you rotate the credential.
Step 1 — Create a storage account and container
-
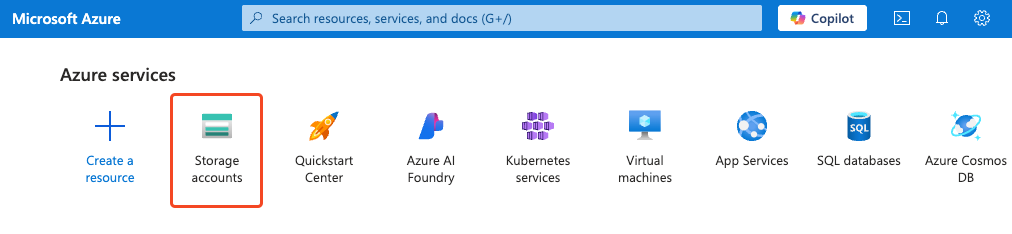
In the Azure portal, open Storage accounts.
-
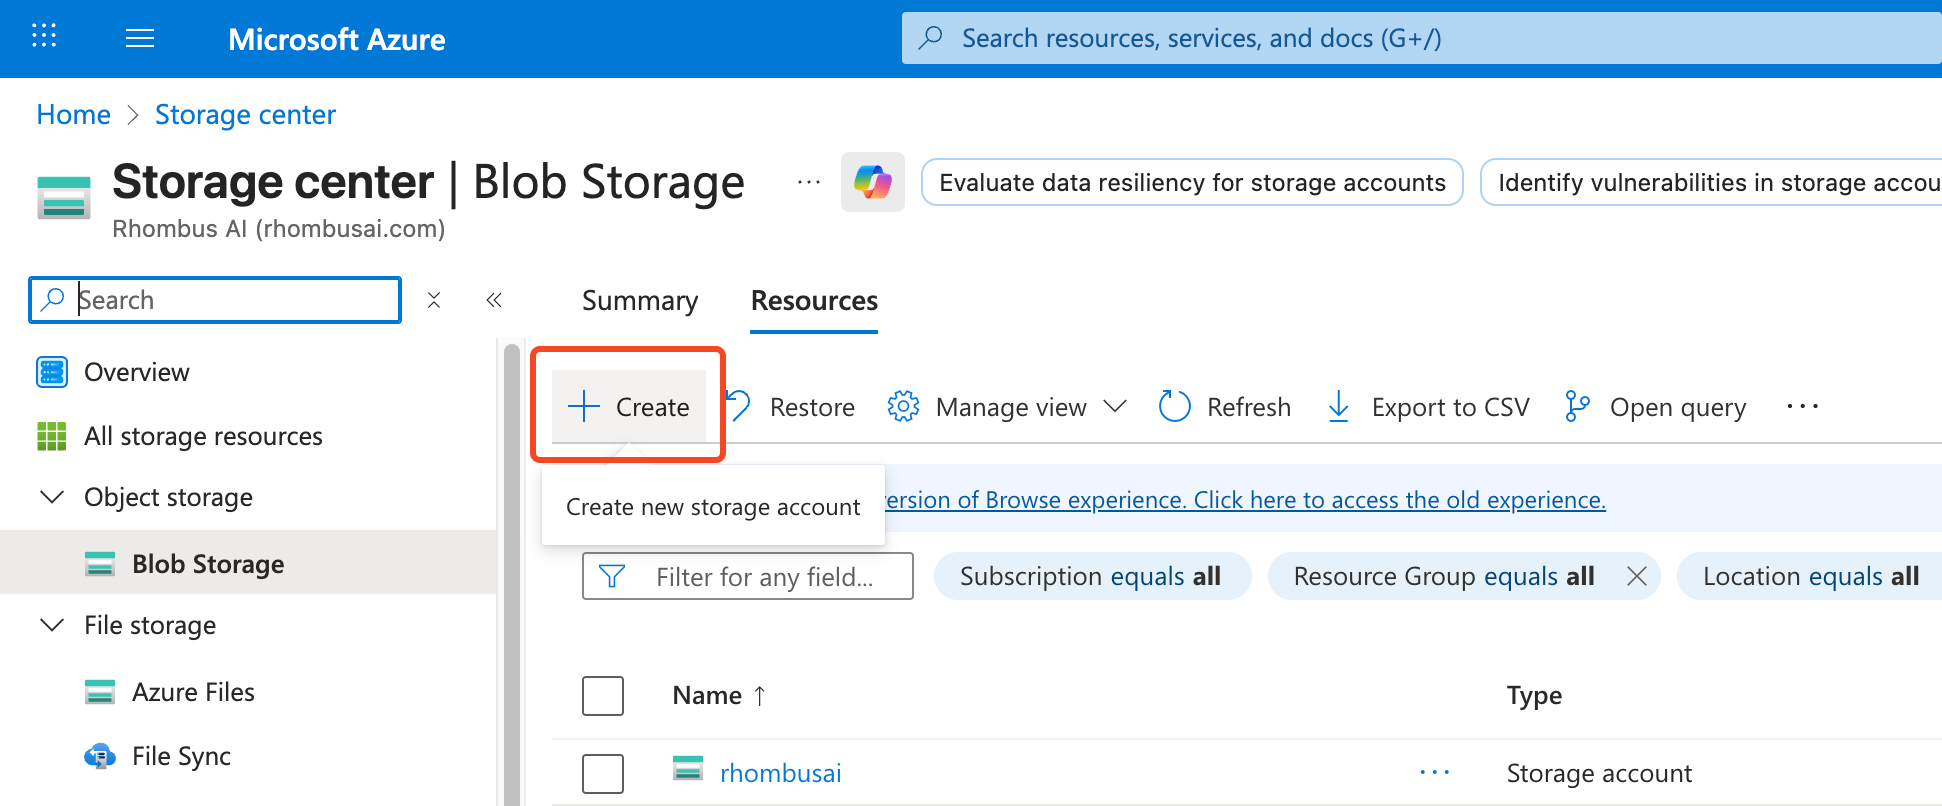
Create a storage account if you do not already have one.
-
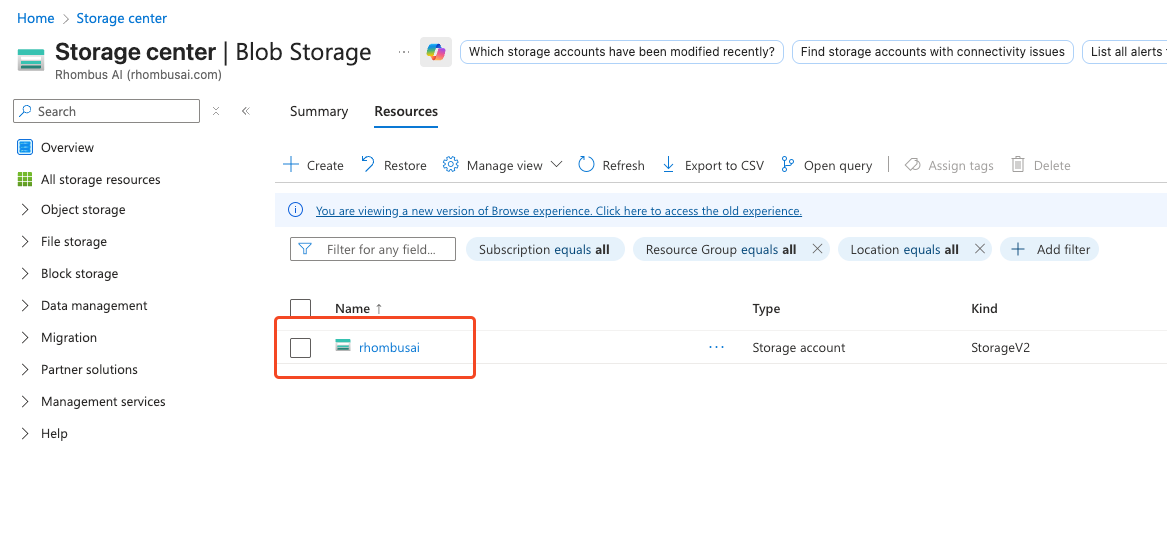
Open the storage account you want to connect.
-
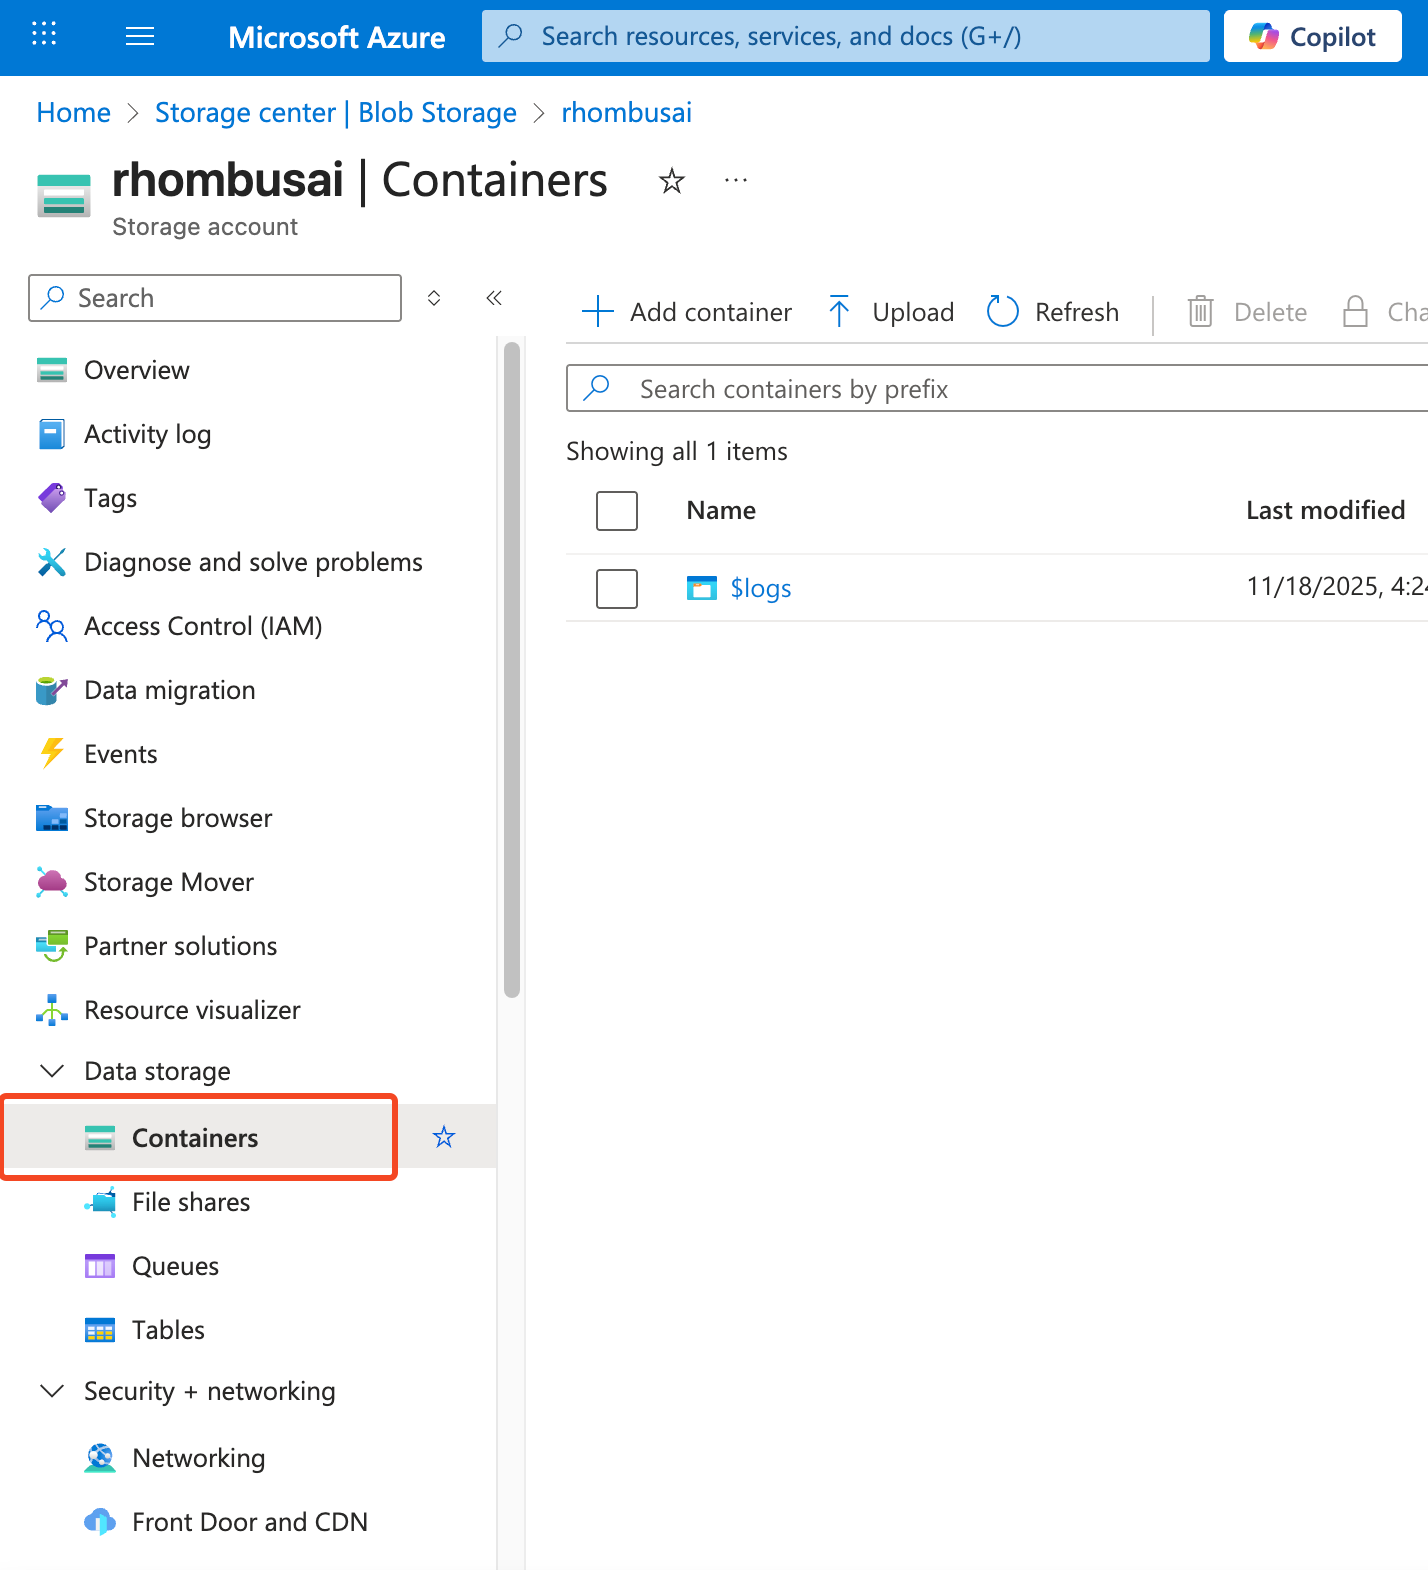
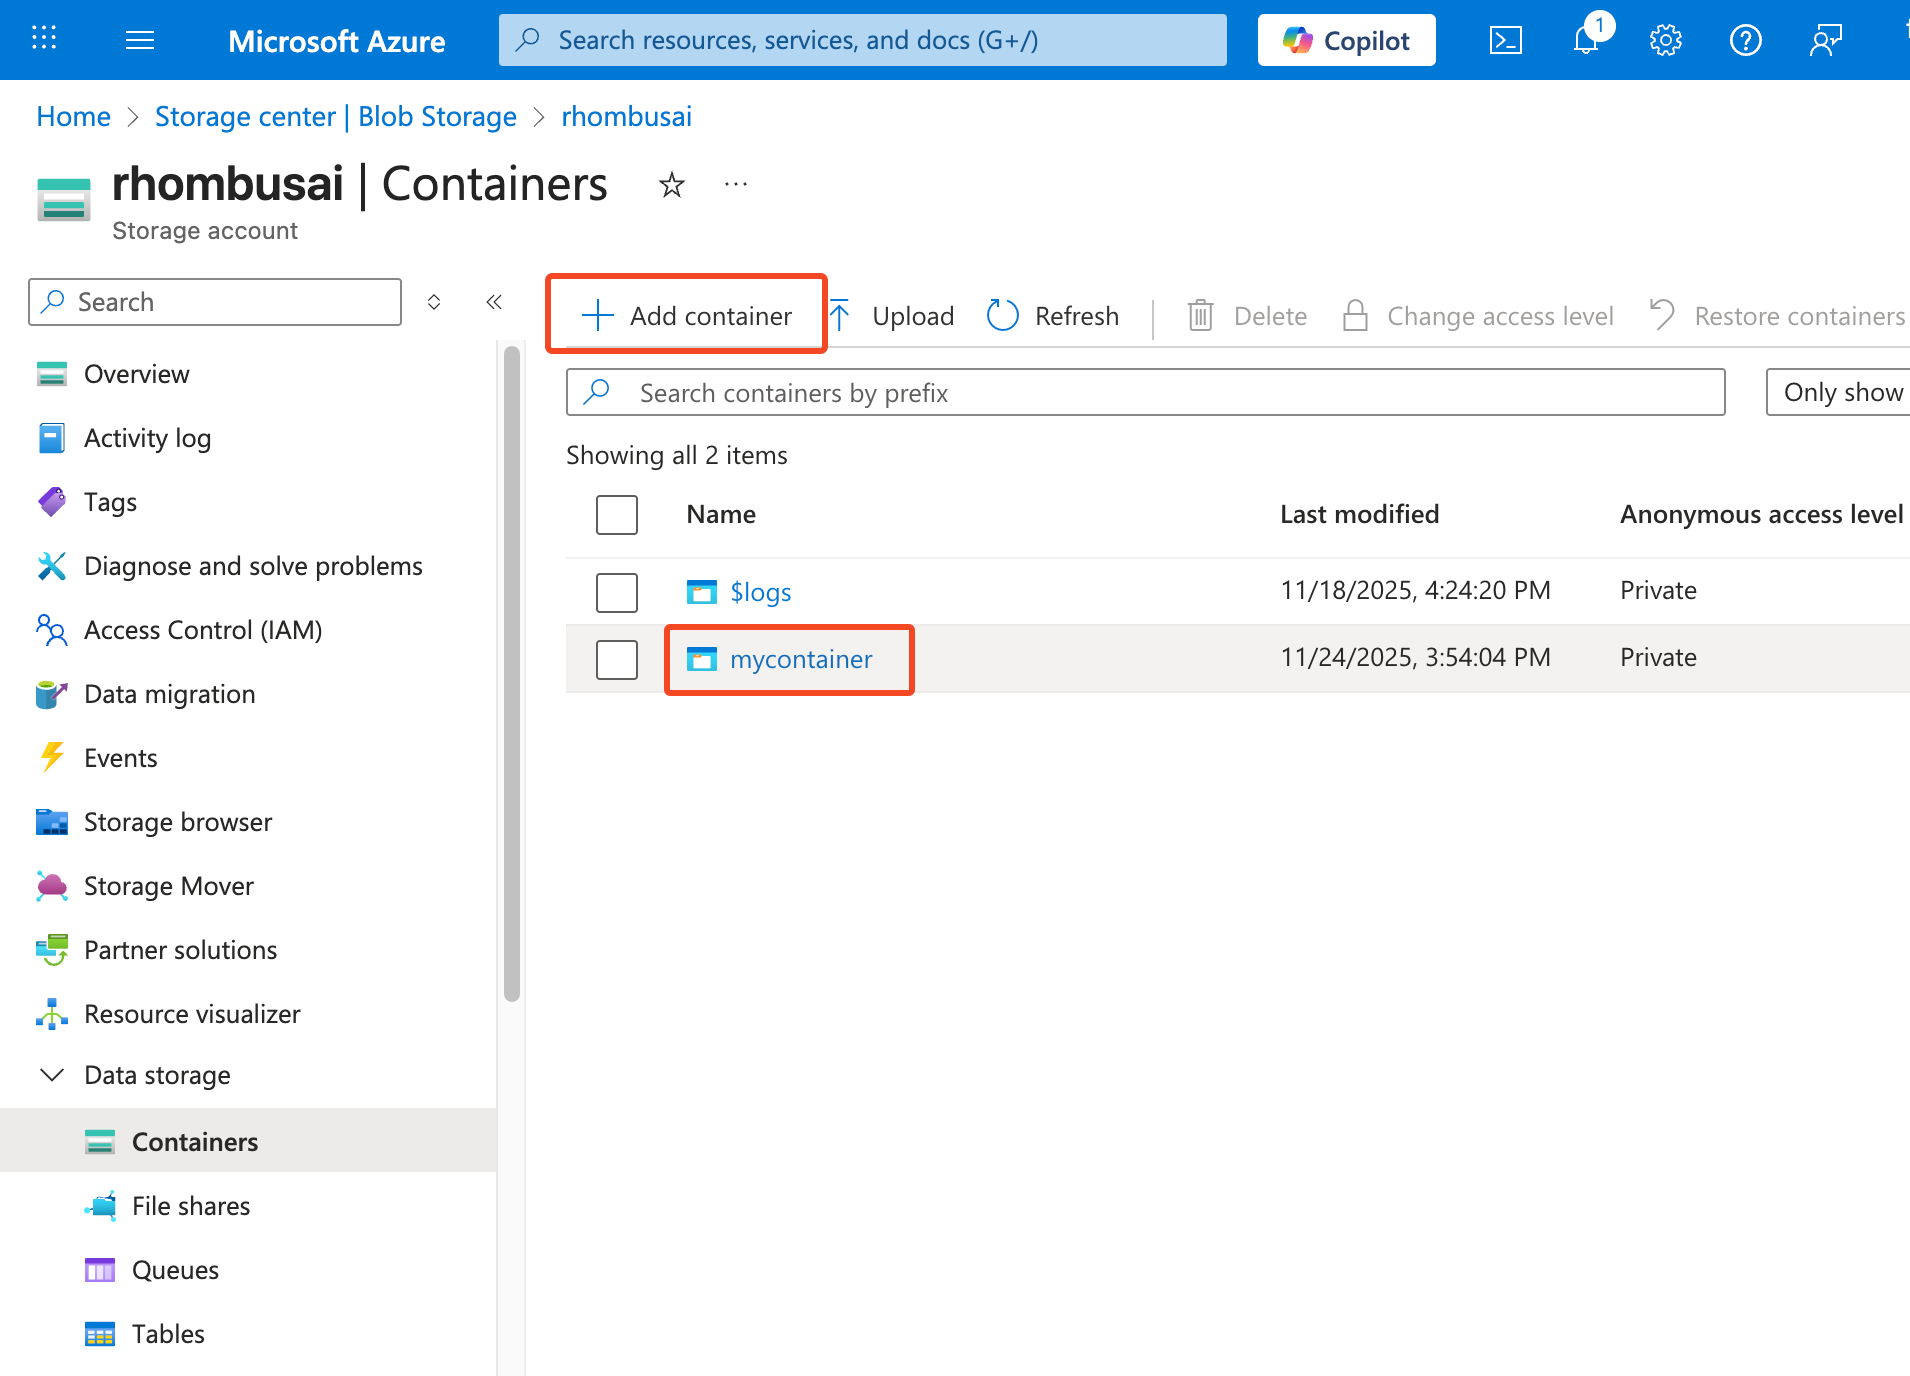
Under Data storage, select Containers.
-
Click Add container, create the container, and record its exact Container Name.
Step 2 — Generate a SAS connection string
Skip this step only when your organization has approved use of an account-key connection string.
-
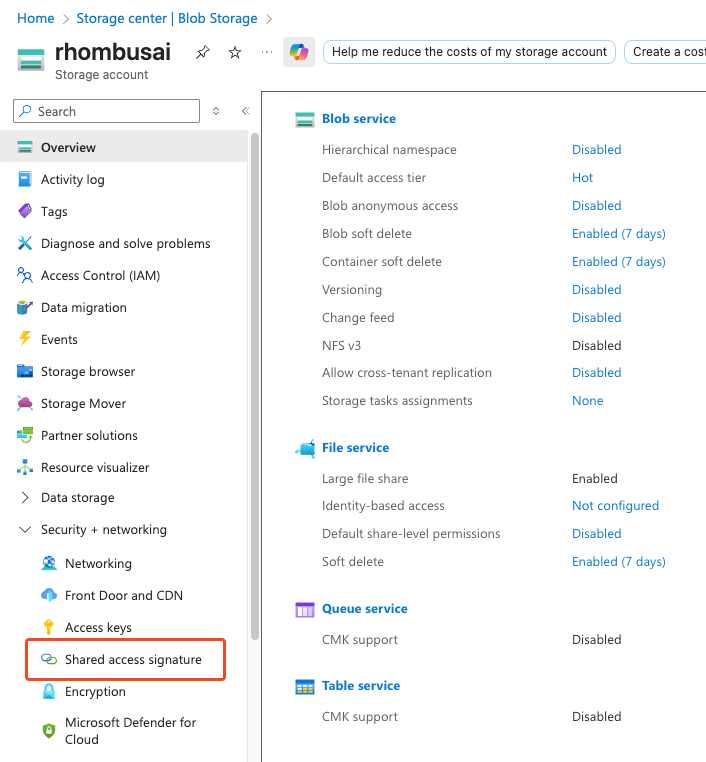
Open the storage account, then select Shared access signature in the left sidebar.
-
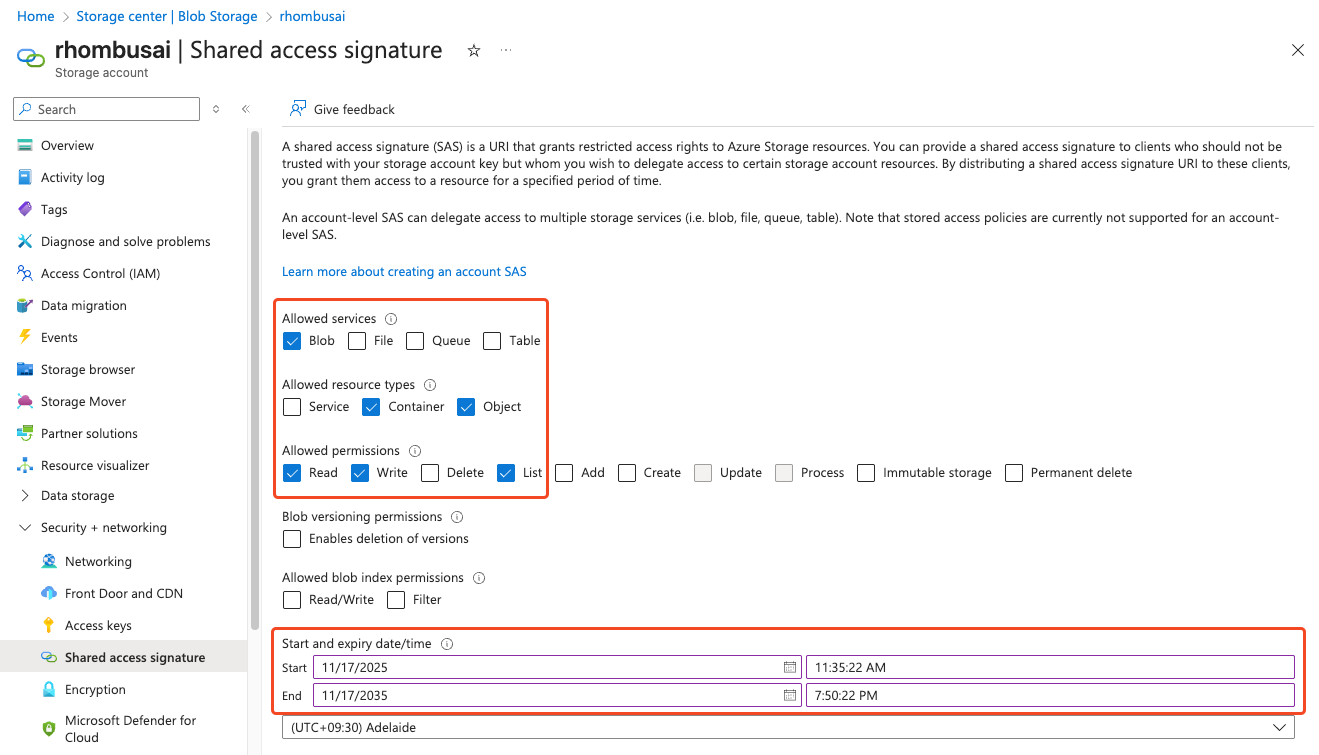
Under Allowed services, select Blob.
-
Select the resource types and permissions that match the connection:
| Use case | Resource types | Permissions |
|---|---|---|
| Basic source | Container, Object | Read, List |
| Advanced source | Service, Container, Object | Read, List |
| Destination | Object | Write; Delete is recommended for verification cleanup |
Advanced Setup needs Service and List to discover containers across the storage account. Basic Setup does not need the Service resource type because you enter the container name yourself. Source-only credentials do not need Write.
Destination verification writes a temporary blob. Delete removes it automatically. Without Delete, verification can still succeed, but you may need to remove the test blob yourself.
If one credential will be used for both a source and destination, grant the union of the relevant permissions.
-
Select HTTPS only, set an appropriate start and expiry time, and apply any network restrictions required by your organization.
-
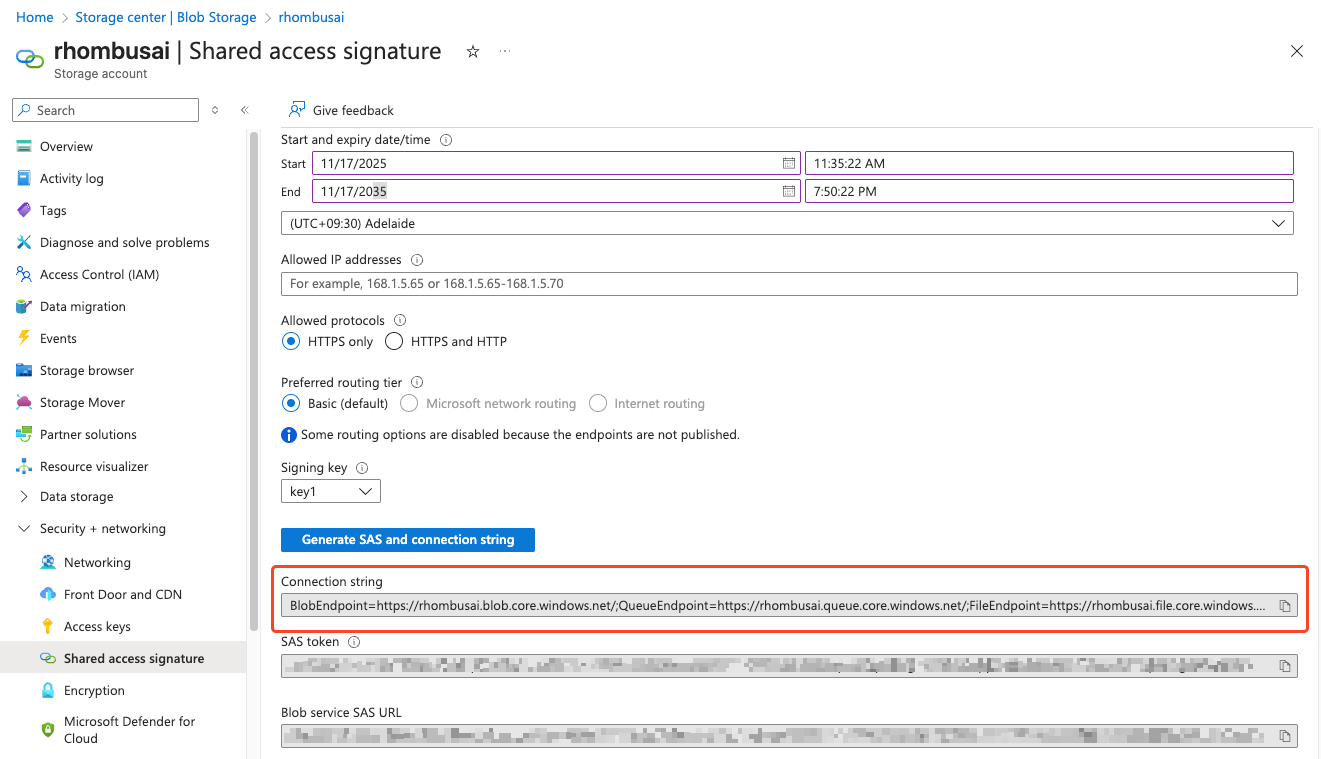
Click Generate SAS and connection string, then copy the complete connection string.
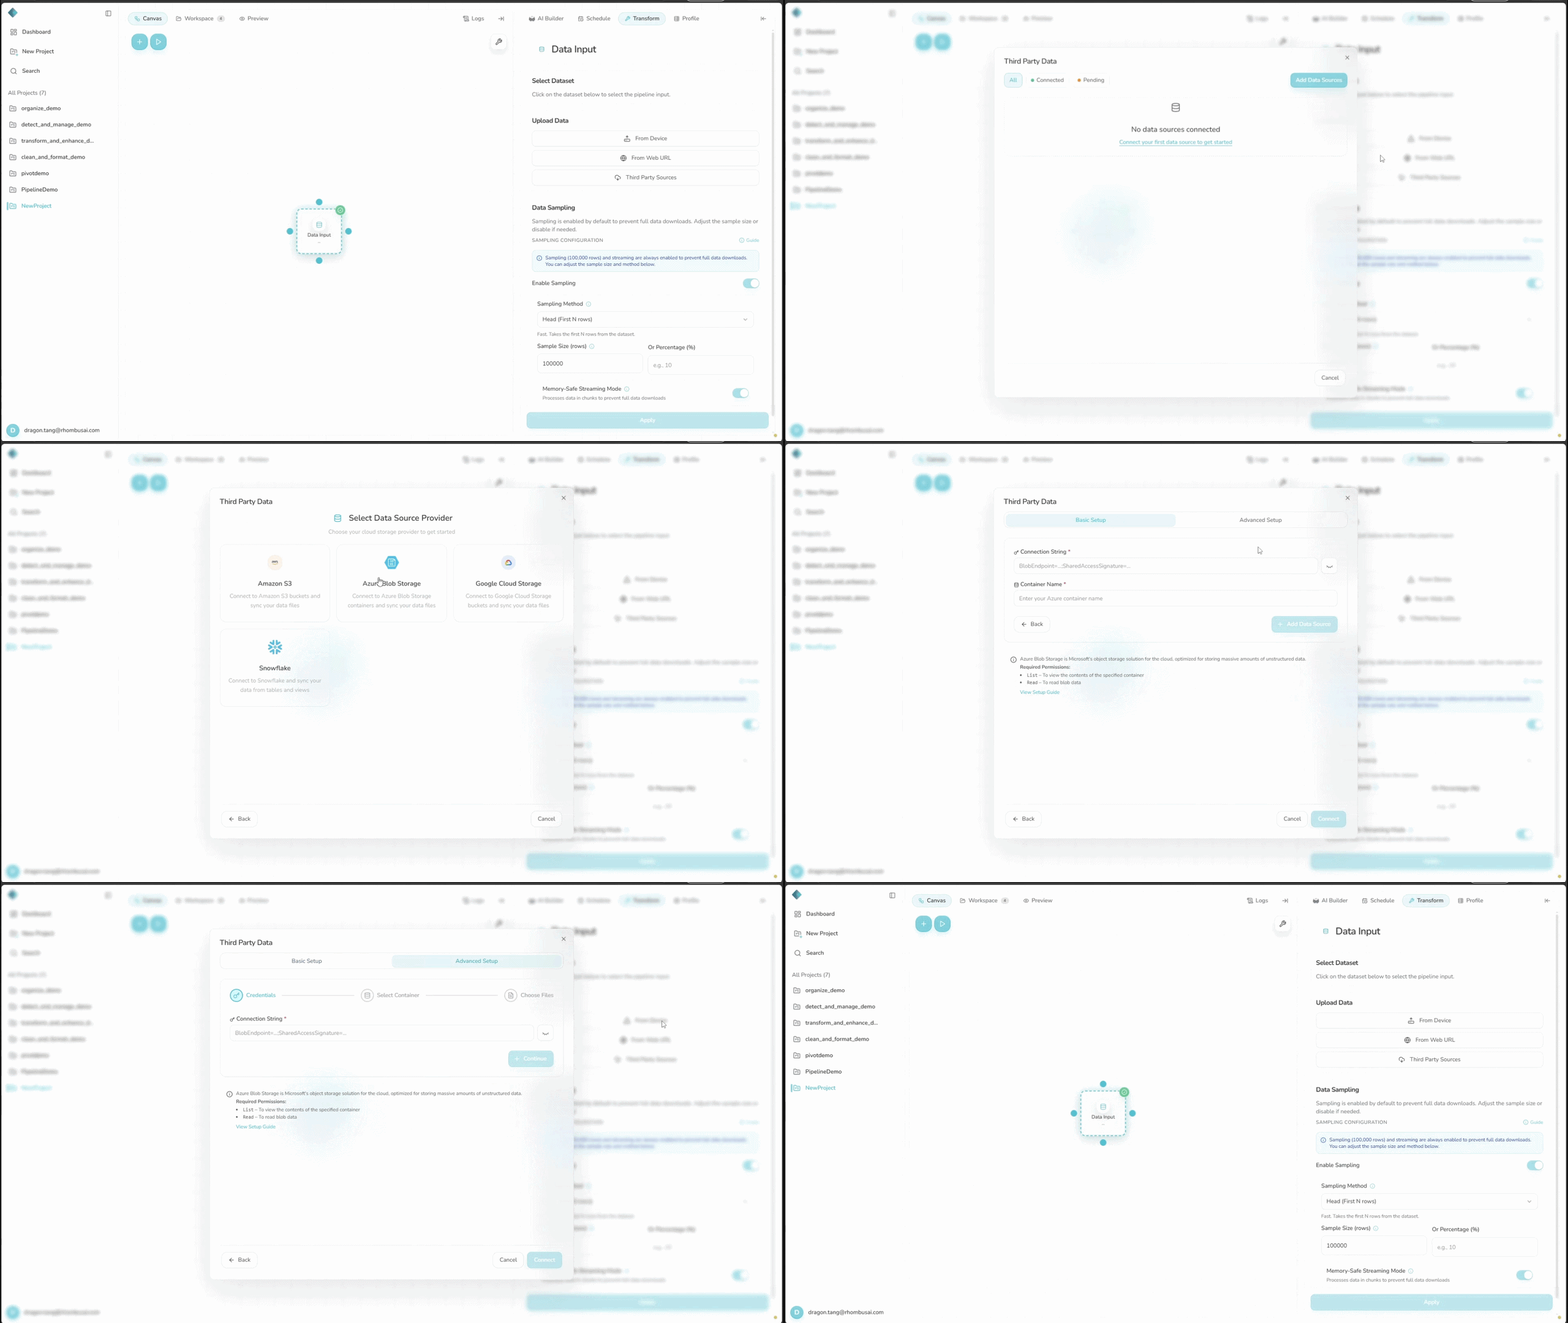
Step 3 — Add Azure Blob Storage as a data source
- Open the project and add or select a Data Input node.
- In the right sidebar, open Transform. Under Upload Data, click Third Party Sources.
- On the data-source dashboard, click Add Data Sources, then select Azure Blob Storage.
- Choose a setup mode:
- Basic Setup: Enter the complete Connection String and exact Container Name, then click Add Data Source. Basic Setup does not include a file picker and can sync supported files from across the container.
- Advanced Setup: Enter the complete Connection String and click Continue. Select a discovered container, select at least one file, and click Add Data Source (N files).
- Wait for the first sync to finish before using the imported datasets.
You can also open Third party sources from the + menu in the AI Builder composer when that option is enabled for your account.
If Third Party Sources is hidden or unavailable, check that integrations are enabled for your deployment and that your plan has an available connector slot.
Advanced Setup currently shows only the first 100 blobs, and selecting blobs in nested paths may fail. It works best with files at the container root. If a file is missing, use a smaller dedicated container or Basic Setup.
Step 4 — Add Azure Blob Storage as a data destination
- Add or select a Data Output node.
- In Transform, open Select Destination and click Add New Destination.
- Select Azure Blob Storage, enter the full Connection String and exact Container Name, then click Create Destination. The connection is verified before it is saved.
- Select the new destination in the Data Output node. It is not selected automatically.
- Choose CSV or Excel (XLSX) under Export Format. Optionally enter a Custom Filename, then click Apply.
- Run the pipeline to write the output to Azure Blob Storage.
Output is saved at the container root with a timestamp added to the filename. Destination credentials are encrypted at rest.