Connect to Google Cloud Storage
Google Cloud Storage connections use a service-account JSON key. You can import files from a bucket or write pipeline output back to one.
Prerequisites
Have the following ready:
- A Google Cloud project and Cloud Storage bucket.
- A dedicated service account with the permissions required for the intended source or destination flow.
- A JSON key for that service account.
- The bucket name when using Basic Setup or configuring a destination.
- Edit access to the Rhombus project. To add a source, you also need access to third-party integrations, an available connector, and enough sync credits for the first import.
Sources support CSV and Excel files (.csv, .xls, and .xlsx). Destinations
can export CSV or Excel (.xlsx).
Service-account keys are long-lived credentials. Use a dedicated account with the minimum permissions needed, keep the JSON file secure, and never commit it to source control. Follow your organization's key rotation policy.
Step 1 — Create or identify a bucket
-
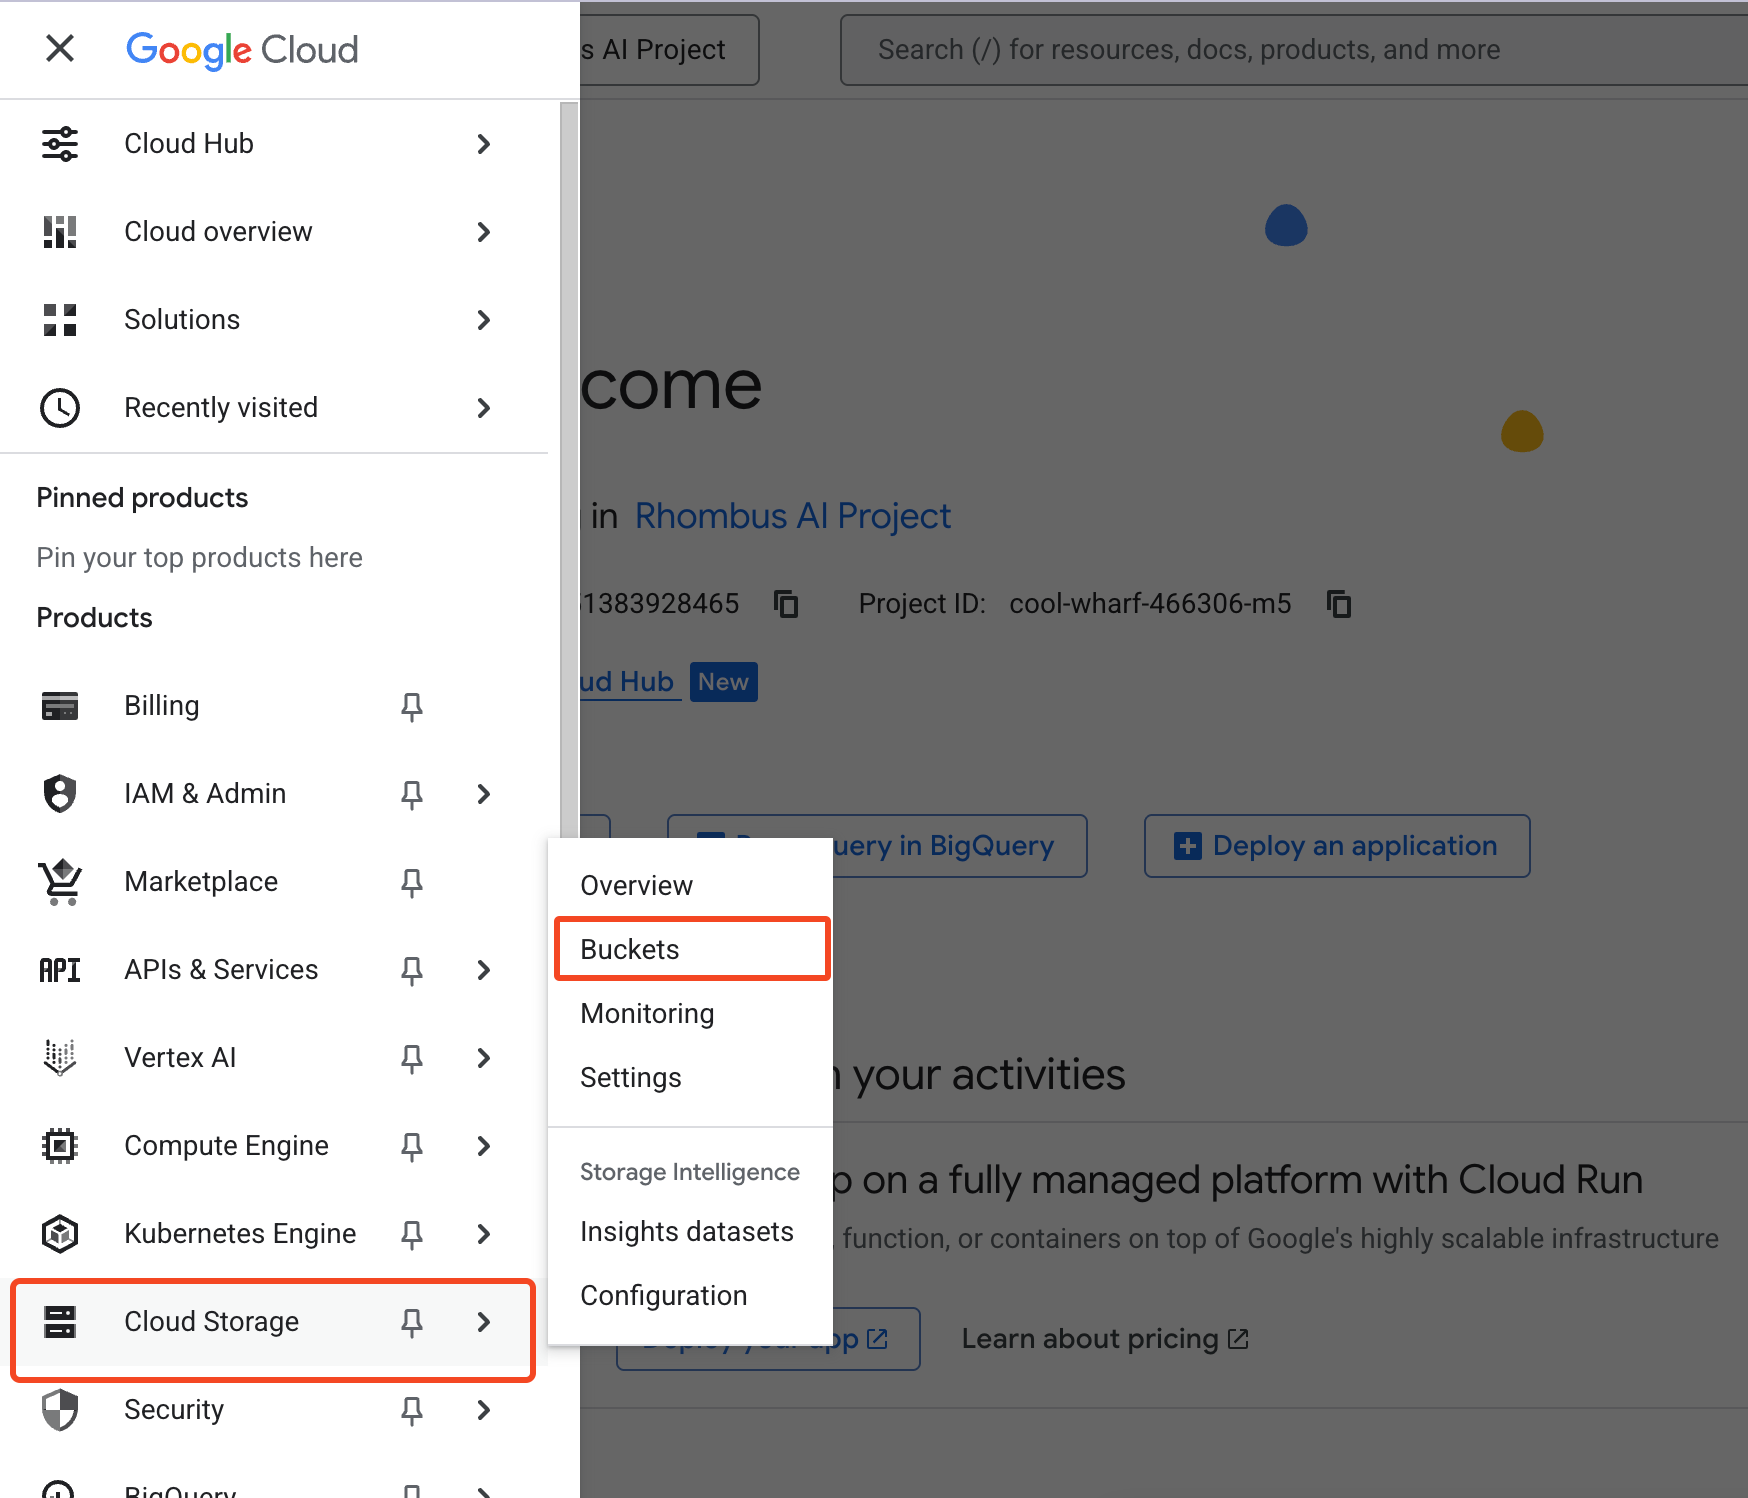
In the Google Cloud console, open Cloud Storage → Buckets.
-
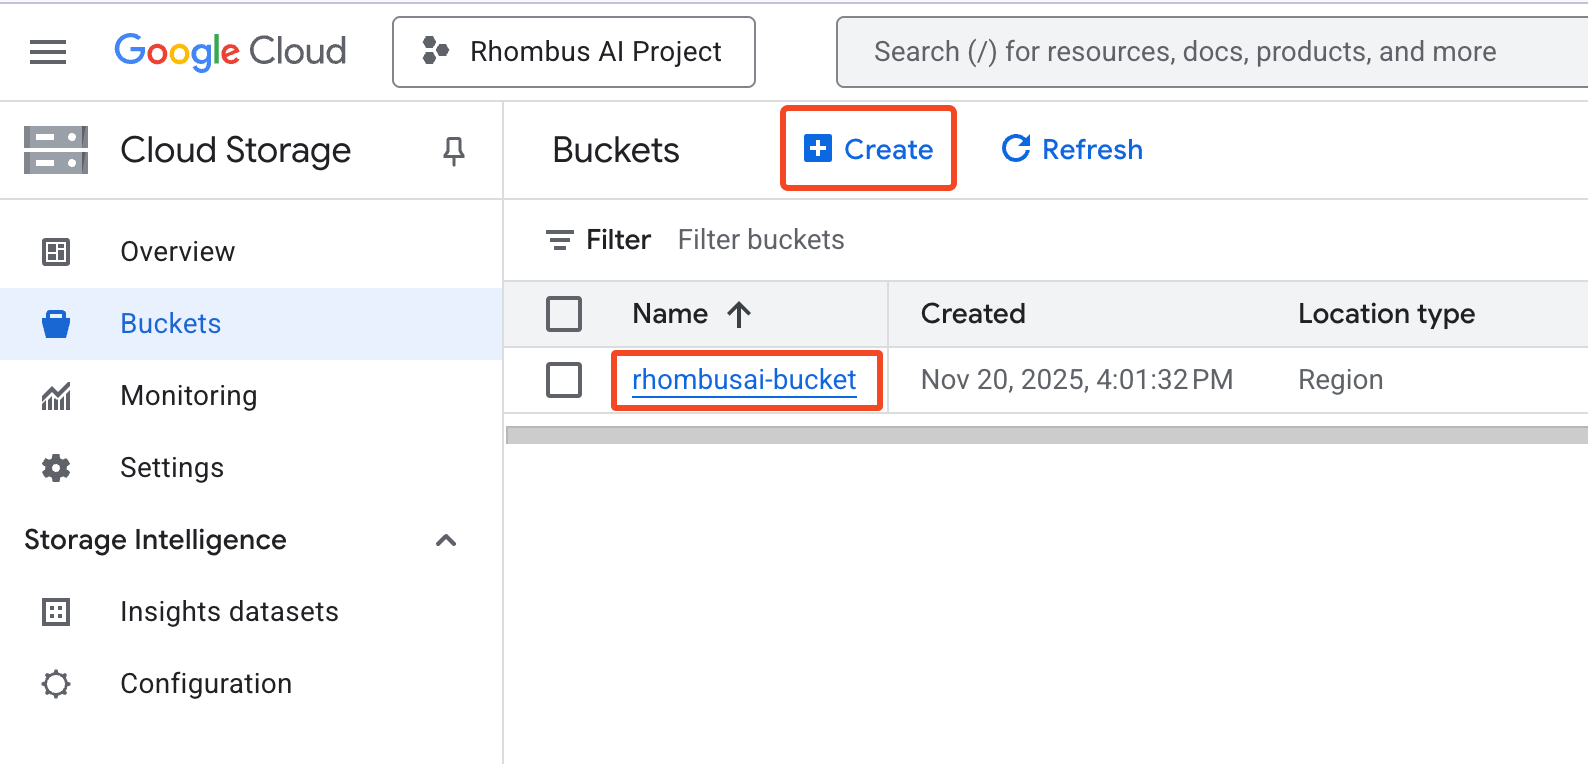
Create a bucket if needed and record its exact Bucket Name.
Step 2 — Create a least-privilege service account
-
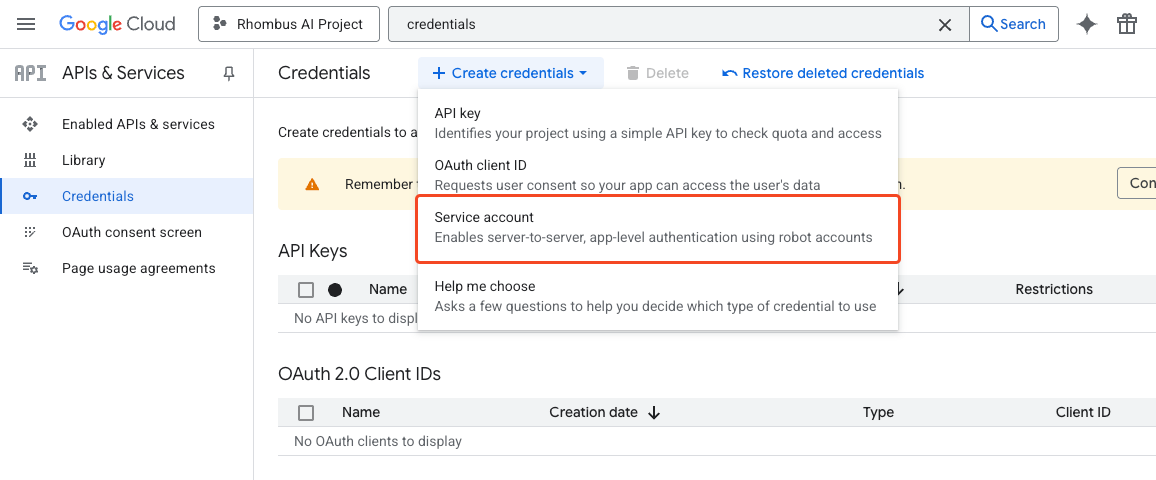
Open IAM & Admin → Service Accounts, then click Create service account.
-
Give the service account a descriptive name.
-
Grant only the permissions required for its use case. A custom role lets you use the following minimum permissions:
| Use case | Required permissions | Recommended scope |
|---|---|---|
| Basic source | storage.buckets.get, storage.objects.list, storage.objects.get | Selected bucket |
| Advanced source—bucket access | Basic source permissions | Selected bucket |
| Advanced source—discovery | storage.buckets.list | Project |
| Destination | storage.objects.create; storage.objects.delete is recommended for verification cleanup | Selected bucket |
Destination verification writes a temporary object. storage.objects.delete
removes it automatically. Without that permission, verification can still
succeed, but you may need to remove the test object yourself.
If one service account will be used for both a source and destination, grant the union of the relevant permissions.
The predefined Storage Admin role works, but it grants far more access than this connection needs. Use a custom role with the permissions above unless your organization requires a broader role.
Step 3 — Generate a JSON key
-
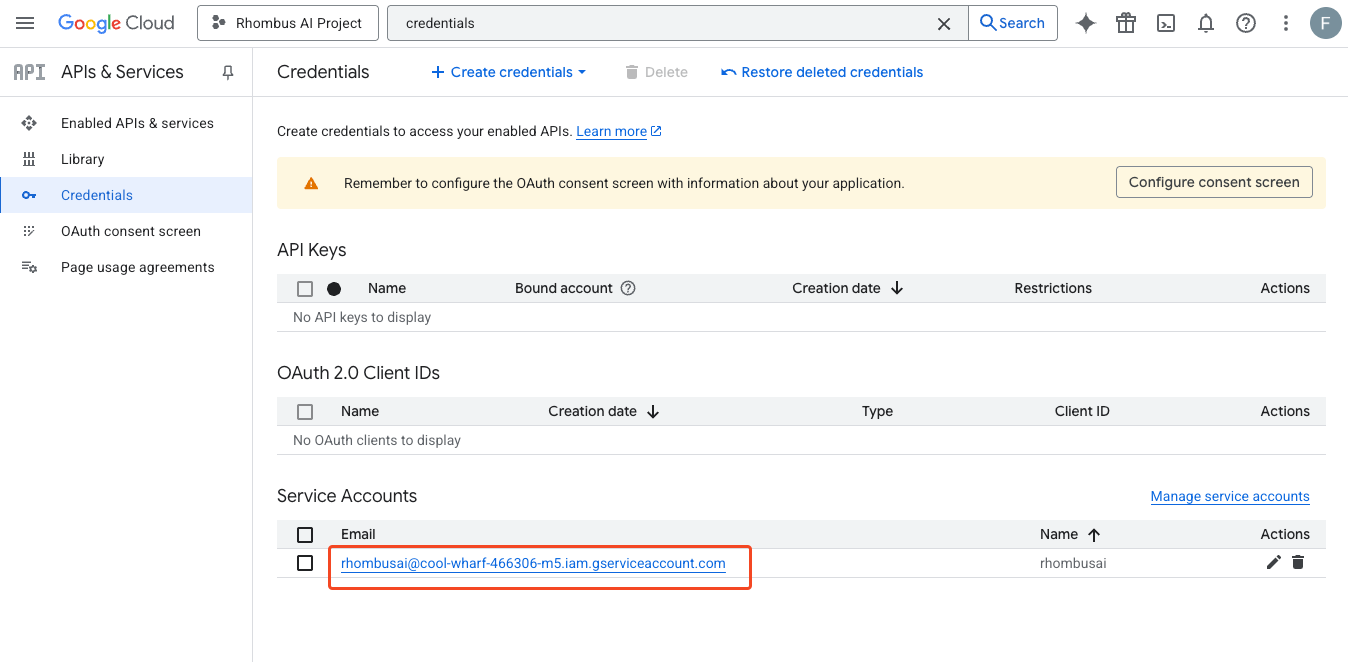
In IAM & Admin → Service Accounts, select the service account.
-
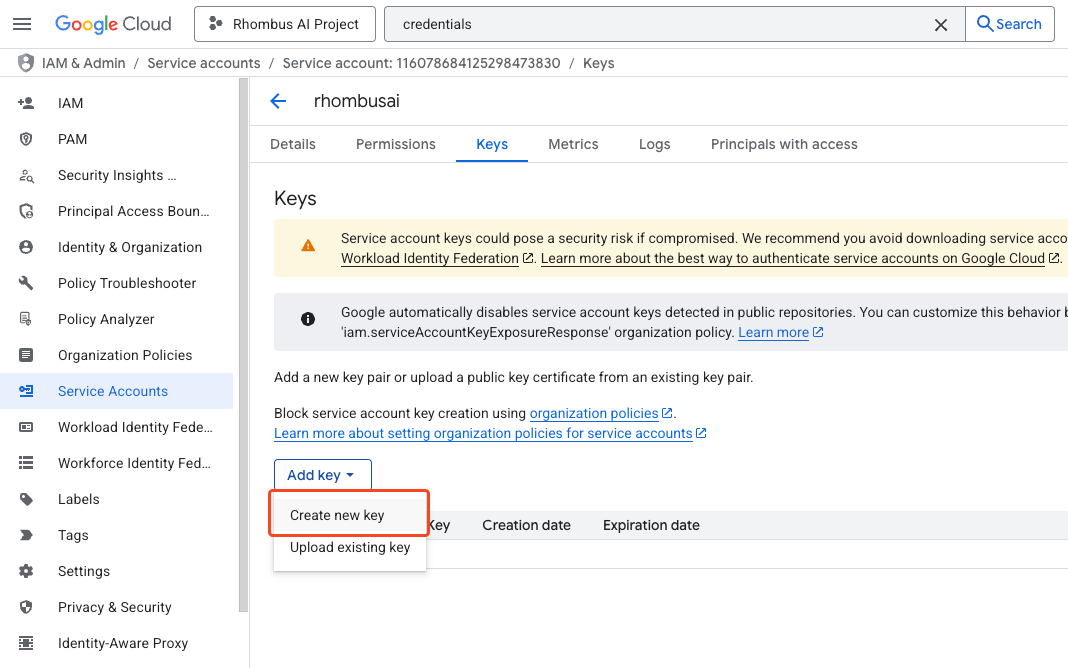
Open Keys, click Add key, and select Create new key.
-
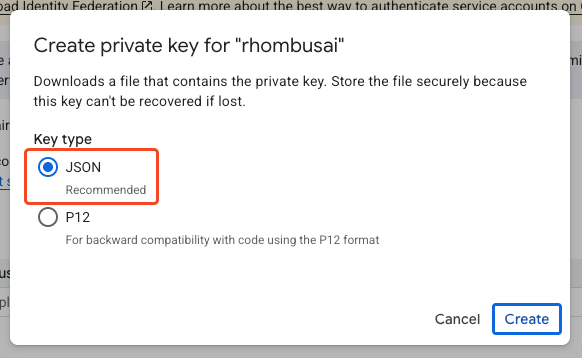
Select JSON, then click Create.
-
Store the downloaded JSON file securely. In Rhombus, paste the full JSON document—not its file path or a few selected fields. A standard key includes
type,project_id,private_key, andclient_email.
Google Cloud organizations can disable service-account key creation. If Create new key is unavailable, ask your Google Cloud administrator for help. This connector currently requires a service-account JSON key; do not weaken an organization policy without approval.
Step 4 — Add Google Cloud Storage as a data source
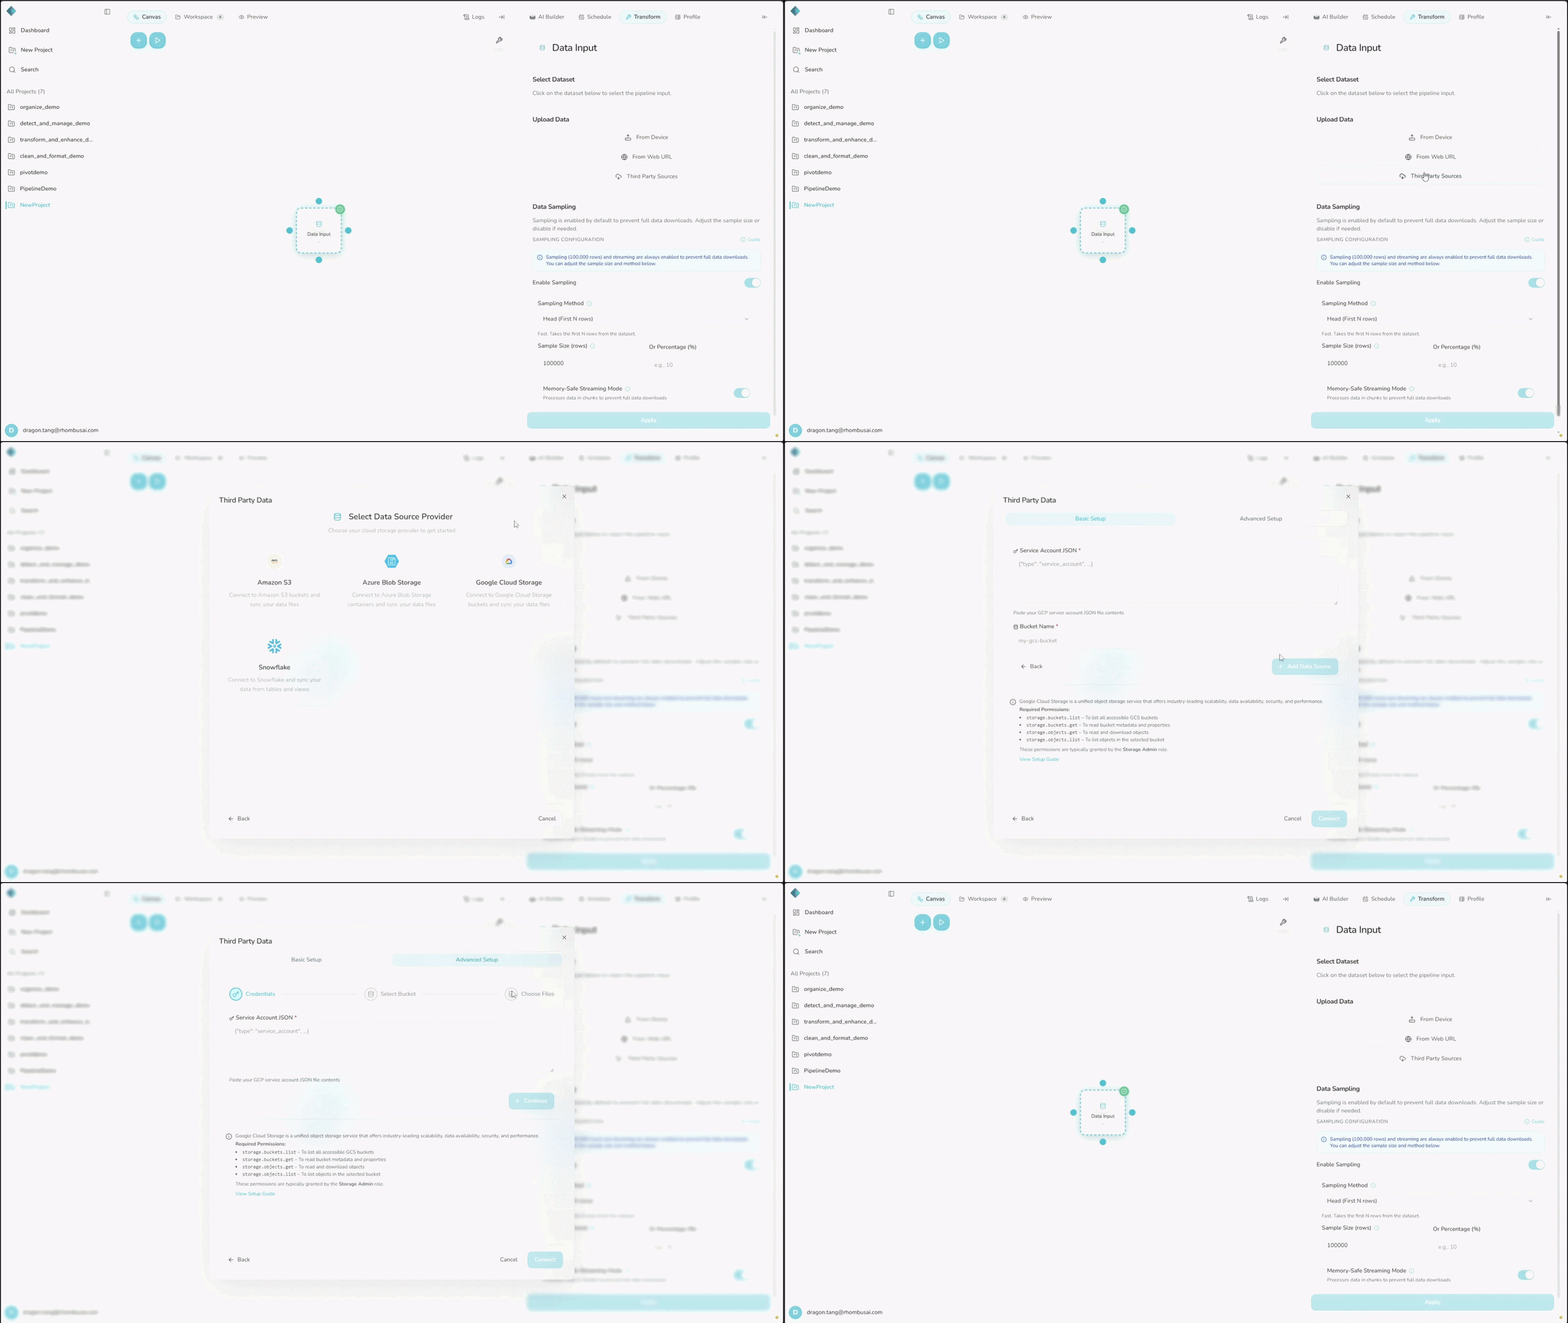
- Open the project and add or select a Data Input node.
- In the right sidebar, open Transform. Under Upload Data, click Third Party Sources.
- On the data-source dashboard, click Add Data Sources, then select Google Cloud Storage.
- Choose a setup mode:
- Basic Setup: Paste the entire service-account JSON into Service Account JSON, enter the exact Bucket Name, and click Add Data Source. Basic Setup does not include a file picker and can sync supported files from across the bucket.
- Advanced Setup: Paste the entire service-account JSON and click Continue. Select a discovered bucket, select at least one file, and click Add Data Source (N files).
- Wait for the first sync to finish before using the imported datasets.
You can also open Third party sources from the + menu in the AI Builder composer when that option is enabled for your account.
If Third Party Sources is hidden or unavailable, check that integrations are enabled for your deployment and that your plan has an available connector slot.
Advanced Setup currently shows only the first 100 objects, and selecting objects in nested paths may fail. It works best with files at the bucket root. If a file is missing, use a smaller dedicated bucket or Basic Setup.
Step 5 — Add Google Cloud Storage as a data destination
- Add or select a Data Output node.
- In Transform, open Select Destination and click Add New Destination.
- Select Google Cloud Storage, paste the full service-account JSON, enter the exact Bucket Name, and click Create Destination. The connection is verified before it is saved.
- Select the new destination in the Data Output node. It is not selected automatically.
- Choose CSV or Excel (XLSX) under Export Format. Optionally enter a Custom Filename, then click Apply.
- Run the pipeline to write the output to Google Cloud Storage.
Output is saved at the bucket root with a timestamp added to the filename. Destination credentials are encrypted at rest.